Synth Gloves
For a class I’m doing as part of my PhD I had to find and hack a piece of “cruft” – some sort of used hardware or physical detritus – and make it do something new and interesting.
I have been interested in both wearable technology and performance tools for some time. I found a pair of elbow-length gold gloves in a vintage store that I thought would be perfect for this – accessories typically enhance and extend an outfit, and I wanted to enhance and extend these accessories. Besides, who wouldn’t want a pair of gold gloves, especially ones that did something cool.
The idea
I wanted to make these gloves into a synthesiser using an Arduino. I have been really frustrated with the fact that MIDI control devices and synths are often keyboards; there’s no real reason for this, except that people like and understand keyboards. I wanted to make a completely new synthesizer interface using something wearable.
Which sounds simple enough, but as usually the way with these things, it really really wasn’t. The technical challenges here were profound and numerous, often cropping up unexpectedly when it was already midnight. Here’s a list:
Coding and sonification
Instead of producing the sound on the Arduino (which is limited at best) I decided to use the Mozzi library, a really great sonification library for Arduino. Except that implementing Mozzi is a task in itself, and the learning curve was extremely steep. To their credit, however, the Mozzi folks have included a whole range of example sketches as well as tutorials on their site, which were really, really helpful.
I wrote the simplest iteration of this sketch using just simple sine waves. When the wearer connects a circuit and makes a tone, they can bend the pitch a little, using the Y-axis of the accelerometer. I managed to get this working and uploaded to the board, when my elderly Macbook managed to crash and come back without a saved version. This meant I had to rewrite it from scratch, which I did after the project was over because tight deadlines dictated that I had to get to actually building the thing. The good news, however, is that the code has been rewritten and is much better now, the gloves sound more like I envisioned them! If you’d like a peek, click here to read the code on Pastie.
Amplifier blues
I made an amplifier using an LM386 integrated circuit. This chip is great: it’s low-voltage, easy to implement, and does exactly what you would expect it to do – once you know how to use it correctly, which took me a huge number of attempts. (If you’re interested, the data sheet is here and I used the most basic schematic with an extra filter added on which is totally optional.)
I assembled what I wanted to transfer to the glove on a series of breadboards first:
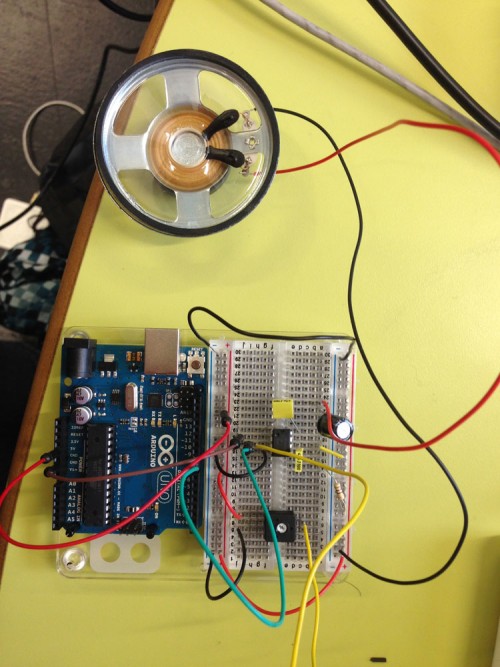
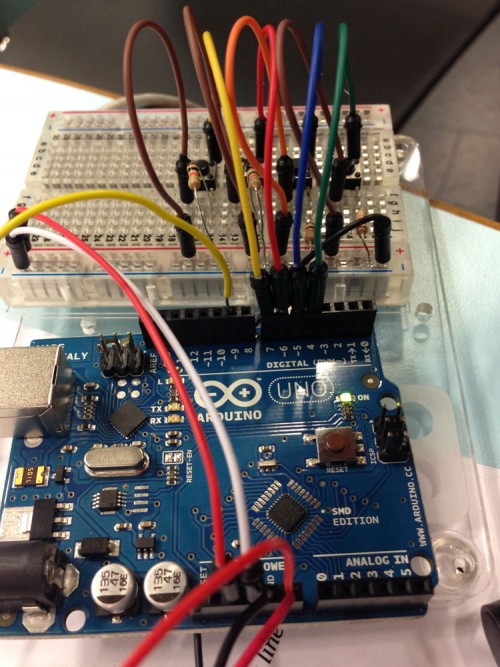
(I also added an accelerometer that connected to the A0 analog pin, but unfortunately don’t have a shot of that.)
In an effort to not use any breadboard on the glove itself (even though it’s a prototype I wanted everything to be soldered) I assembled the amplifier circuit on a board.

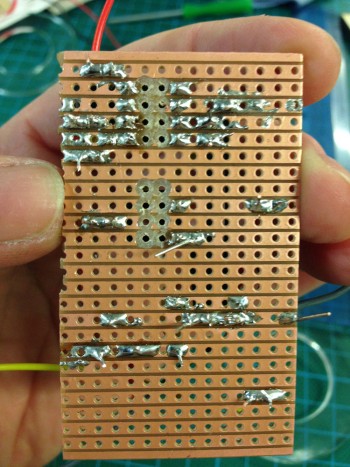
… And then I plugged it in, and it didn’t work. Well, it made sound, but it was really quiet.
Ho, the absolutely amazing guy in the Electronics Lab, helped me determine what the problem was. With a microscope and a meter we determined that the problem wasn’t in the amplifier at all, but rather there was a loose solder joint on the speaker. Relief! (I owe Ho a lot of cupcakes, I’m always bothering him for something or other.)
I also soldered the accelerometer to a bit of board as well:

That’s the accelerometer mounted to the board, that I’ll talk about in a second. You might notice an unused yellow wire there; that’s because when I was working with breadboards I had everything working off the accelerometer’s X axis. When I actually mounted it on the glove – the accelerometer served to bend the pitch when I moved my hand up and down – I realised that I was actually using the Y axis. I hastily soldered a wire to the Y axis and coiled up the one from the X axis so I wouldn’t accidentally use it for something.
Assembling all this hardware on a glove
Now that the components all worked, I had to find a way to put it all on the glove. Mounting everything on the glove was difficult. I ordered some parts that never arrived, including an Arduino Nano which would have been much, much easier to mount on something wearable. As it happened, I had to use a full-sized Arduino board, which was really clunky and not ideal. It still worked though, thanks to a packet of Velcro that I happened to buy in Maplins on a whim the day before. I had to cut a mount for the speaker on the laser cutter so it had something to cling on to:

This meant that I now had something that I could stick onto the glove that held the speaker in place. Thanks Velcro!
Hand-sewing the circuitry
I hand-embroidered the circuits, and determined the best method for this by a lot of experimentation. Initially I embroidered patches to attach to the finger tips. It looked pretty jacked up though, and I wasn’t convinced it was going to survive more than five minutes:
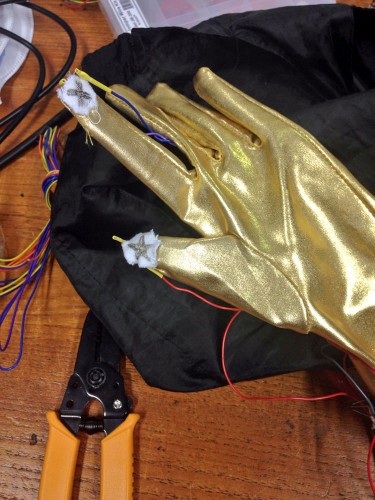
I decided that to work reliably I had to come up with a way of making the switches out of a single piece of conductive thread, but I couldn’t sew the thread into the glove or my skin’s own conductivity would short it out. So, I made channels for the thread out of felt, fed a thread into the leftmost one that would attach to a digital pin, embroidered the fingertip, then fed the thread out the other side, attaching it to a resistor and then the ground.
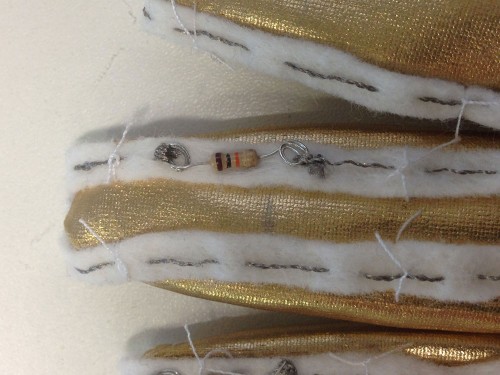
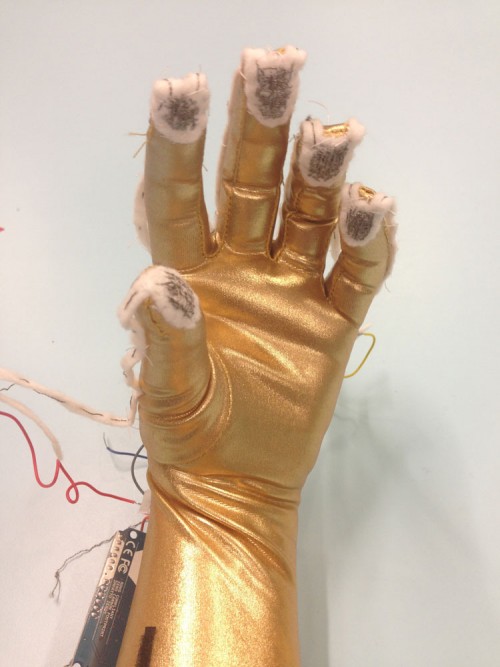
The finger switches worked by touching them to the thumb, which carried the 5V power from the Arduino.
I didn’t have time to make it look awesome, but I’ve found gold polyester thread that contains no metal, and I’m planning on embroidering it over the bare thread to create a little insulated channel for it to run through. This will really improve the look of the gloves, and get rid of much of the bulk.
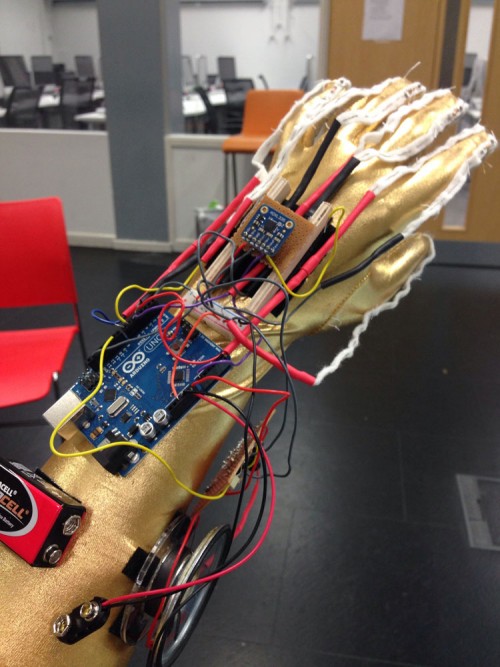
I mounted the accelerometer by raising it up on little wooden stilts and running some of the wires underneath it. I also saved some real estate by hacksawing a rail from a breadboard in half, and using that for power and ground.
And, finally, here’s what they ended up looking like:
Enough talk, get to the videos!
Here’s two videos of the first iteration:
Then, I rewrote the code and it really improved them. The pitch bend works much more like I wanted! Here’s a clip:
Conclusions
I learned a ridiculous amount making this glove. Here’s a list of really great lessons that I learned:
– To quote Ho: “The meter don’t lie.” If something isn’t working, use a multimeter instead of trying to guess where the problem is as you will almost always be wrong. Debugging hardware like this is hard because it’s a mix of hardware and software, but ruling out the hardware problems first saved so much time.
– A 9V battery can power an Arduino through the Vin pin, which you can send out to other devices (like an amplifier). The Arduino happily does some voltage conversion and takes its own 5V, which you can send out through the 5V pin to switches and devices. How lovely and easy!
– Colour coded wire and heat shrink are miracles of the modern age.
– Prototype fast and often.
– Don’t think that your work will be saved by your Mac if it crashes. Because really, really really, it’s not always the case.
I’m going to finish the pair over the holidays this year, and I’ll post an update when they’re done. Here’s the improvements I want to make:
– Right now these gloves just make simple sine waves. I’d like to do some wave shaping to get them to sound more interesting.
– They also only use one axis of the accelerometer, but I’d like to increase this. For example, I’d like the pitch bend to be on the Z-axis (raising your hand up and down instead of wagging it) and use the other two axes to produce more interesting effects
– Get proper parts and remake the gloves so the hardware is mounted properly and they look great
– Insulate the circuitry with gold thread so you can’t see it and it becomes a design element
– Come up with a better pattern to create the fingertip switches


